You should clean your Brita pitcher whenever you change the filter; which is typically every two or six months. Another telltale sign that you need to clean your pitcher is when the brita filter pitcher is suddenly slow.
Cleaning your pitcher is crucial because water stains the inside of the pitcher with time. On top of that, residue from the filter might also end up on the bottom of the pitcher and build up.
Luckily, these pitchers are simple to take apart and clean, so the whole process can be over and done in no time.
Dos and Don’ts When Cleaning Brita Pitchers
Before we tell you how to clean the Brita pitcher, here are a few things you need to know to ensure you don’t damage the pitcher.
Hand Wash Only
The fact Brita pitchers are portable is a significant advantage they have over other water filtration units. They can fit on counters and kitchen surfaces, regardless of your kitchen’s size, and they also fit in almost any fridge except for mini-fridges.
However, because of its small size, some people might think they can clean the pitcher in the dishwasher. That would be a mistake, as Brita pitchers aren’t dishwasher safe.
The pitcher, the reservoir, and the lid on most Brita pitchers are all made of plastic, and while the components are decently durable, the dishwasher can damage or break them.
Additionally, while there are glass Brita pitchers, it’s recommended that you hand wash these models, too, since cleaning them by hand only takes a few minutes and eliminates the risk of damage.
Use Dish Detergent
The best thing to wash your pitcher with is a bit of dish detergent, and it doesn’t matter what kind you use since any commercial brand will do.
However, avoid using abrasive cleaners since they can leave marks on the inside of the pitcher. Plus, there’s no need to use such strong chemicals to clean your Brita pitcher, as what you’re cleaning are mostly water stains, soil particles, or mineral deposits, depending on whether you live in an area with hard water.
In other words, nothing of the above can leave stains so persistent that you’d need abrasive cleaners to remove.
However, if there’s a strange smell coming from the pitcher, and you think dish soap will not cut it, we suggest using white vinegar instead.
If you fill a spray bottle with ⅔ water and ⅓ white vinegar, you’ll get an excellent cleaning solution free from harsh chemicals yet still able to remove any stain or smell.
Washing the pitcher 2 or 3 times with dish soap can also eliminate unpleasant smells if you don’t want to make the vinegar solution, but the decision is up to you.
Don’t Wash the Filter
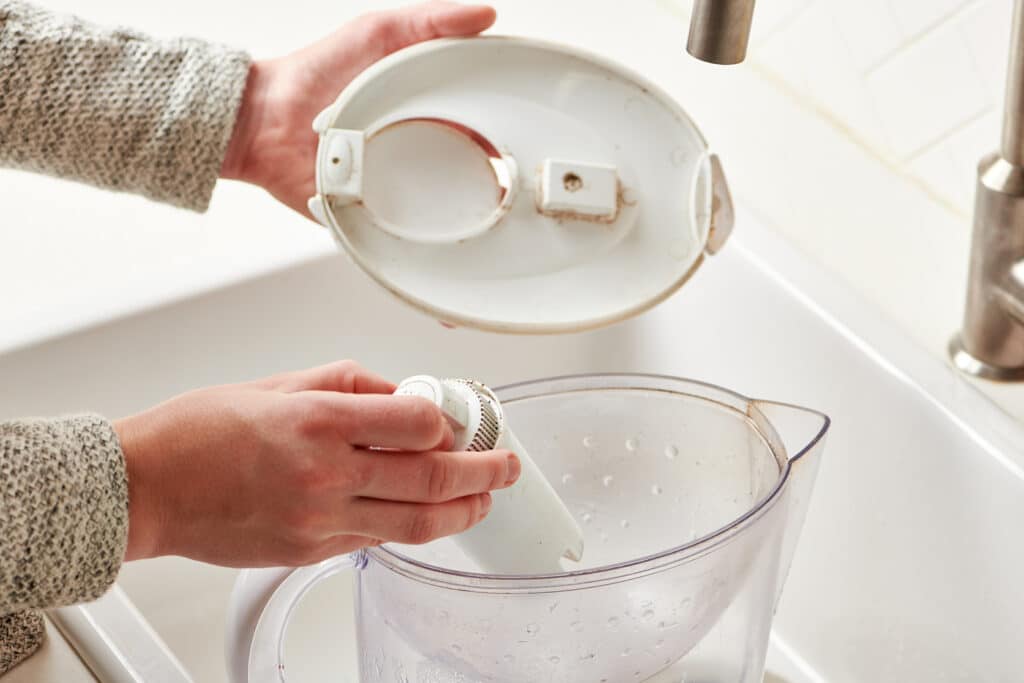
You should not wash the filter! However, if you feel like you need to clean it somehow, we’d recommend simply putting it under the faucet for 10 seconds or so.
The running water can pry loose some sediment particles that may have gotten lodged somewhere, so it’s not a bad idea in either case.
Do not use any soap or vinegar on the filter, as they’ll damage it.
How to Take Apart Brita Pitcher for Cleaning
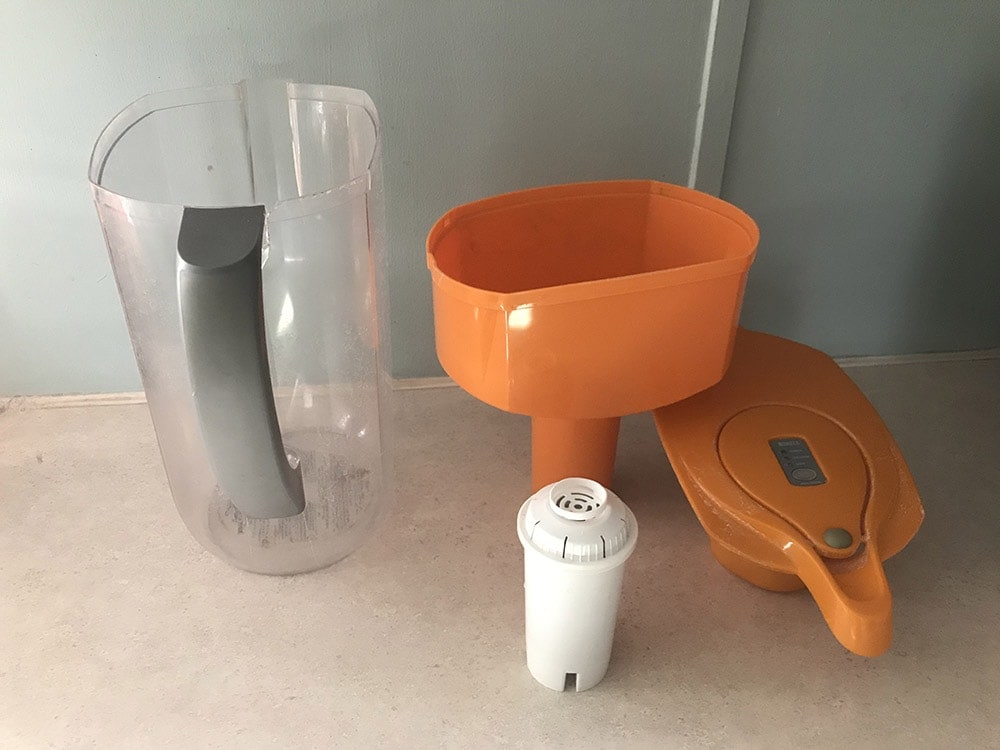
Brita pitchers have four components:
- Lid
- Filter
- Reservoir
- Pitcher
1. The Lid
The first thing to do is take off the lid. For this purpose, you’ll need to detach a lock at the top of the filter to move it.
Once the lid is free, take it off the pitcher and put it somewhere to the side.
2. The Filter
Once the lid is off, you’ll see the reservoir and the filter located right in the middle of the cylindrical casing.
Reach into the reservoir with your hand and rotate the filter to remove it. Once the filter is loose, remove it from the pitcher, and put it to the side.
3. The Reservoir
Now that the filter is no longer in the way, you’ll need to reach into the cylindrical hole where the filter used to be, grab the reservoir, and pull it up and out of the pitcher. Again, you’ll need to put this piece somewhere to the side.
4. The Pitcher
If you removed all the other parts, the only thing left would be the empty pitcher. This is good, as an empty filter is what you need to be able to clean it thoroughly from dirt or mineral deposits.
Place the lid, reservoir, and pitcher close to the sink and get a sponge. Bear in mind that you should not clean the water filter, so keep it to the side somewhere.
Cleaning the Pitcher
What You’ll Need:
- Dish soap
- Sponge
- Dishtowel
- White vinegar solution (optional)
Instructions:
Step One
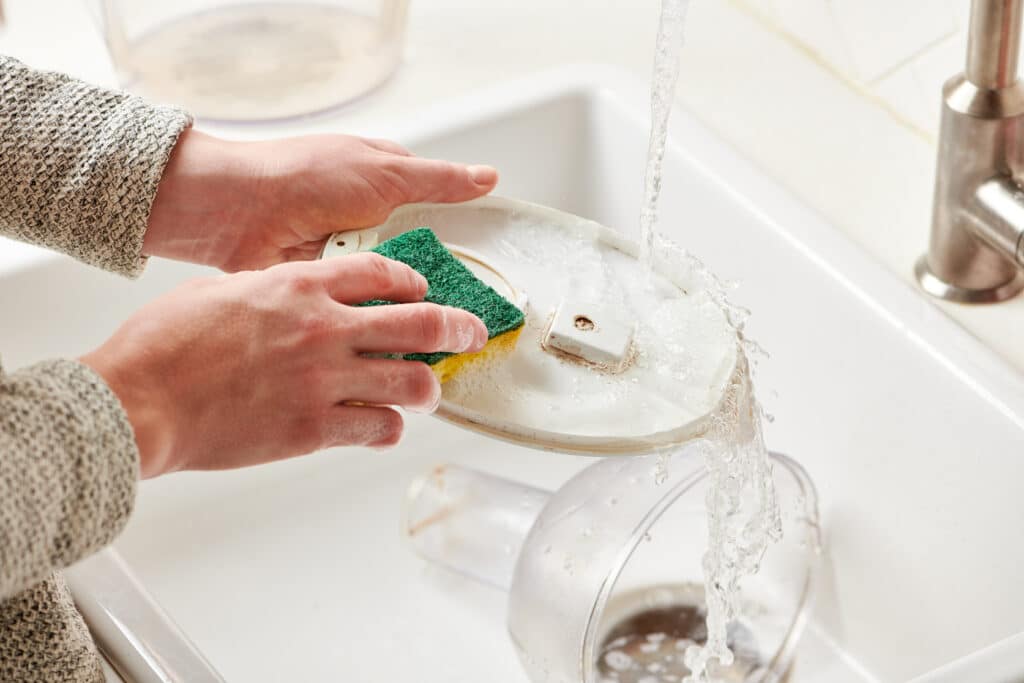
Get a wet sponge, put some dish soap on it, and start scrubbing.
Step Two
Be thorough. Make sure you carefully clean the underside of the lid and the filter holder part of the reservoir. That’s where a lot of dirt particles get stuck, so make sure that you really run the sponge through those sections a few times.
Step Three
Put everything to the side again. After you’re done, leave the parts to dry for a while, then go over them with a clean towel.
Once all the pieces are dry, you will need to put everything back together.
Step Four (Optional)
If you’re using white vinegar, simply spray down all of the components with a spray bottle full of the white vinegar solution.
Then, you’ll want to go over the components with a sponge to get the vinegar in every nook and cranny (paying the most attention to the parts of the lid and the reservoir we mentioned), and then you’ll need to rinse everything out.
Let it dry, get a clean towel to collect the leftover water residue, and then put everything back together again.
Conclusion
If you want to clean your Brita pitcher, you need to take it apart. Fortunately, the procedure is effortless and straightforward.
After separating the components, you need to wash them with dish soap or vinegar solution. But make sure you rinse them out thoroughly before reassembling the pitcher to avoid any nasty vinegar or soap aftertaste in your water.
If you followed all our instructions, you’ve just learned how to clean your Brita filter. Just remember not to use any soap or vinegar on the filter, as they’ll damage it.