One of the first signs that you might be dealing with an RO tank problem is the low amount of water that comes out when you open the faucet.
This usually indicates that the reverse osmosis tank is not filling up properly due to either clogged RO membrane, low pressure in the RO tank, low water pressure from the water source, leaky tank, or clogged RO filters.
The Average Time it Takes the RO Tank to Fill Up
The RO system tank fills up at quite a slow pace of around 2 to 3 ounces of water per minute. At this pace, if the water drips into a glass cup, for instance, it would take 1 – 2 minutes to fill it. This is why the RO system works around the clock to fill up the tank – so that you can have water on demand at any time and not wait for the filtration process to run its course.
If the system has low pressure or clogged filters & membrane, it will take at least five minutes to fill a glass of drinking water.
The Reasons Why Your RO Tank Isn’t Filling Up
1. The Tank isn’t Properly Pressurized
The reason why your RO tank isn’t filling up is that it might have pressurization issues. In order for the average RO tank to push water out, it needs around 40 pounds per square inch of pressure.
Before resorting to any solutions, make sure the water supply valve is open. Check whether there is enough water pressure in the supply line for the system to work as it’s supposed to. Once you’ve done that, you can then go ahead and check the pressure of the tank.
Before checking tank pressure, it’s also very important that you shut off the power and drain the water system, so that there is no water pressure before checking the tank. In order to depressurize the tank you will need to turn off the pump breaker to the pump and open a faucet in order to drain out water from the tank. Keep the breaker off the whole time while you are checking the tank.
If you’re dealing with a new tank, then you should make any necessary adjustments before the installation process. You should measure the pressure by making use of a gauge (both dials and digital ones will do just fine). You can also use a standard tire gauge if your tank has a Schrader valve – most of them do.
How to Check RO Tank Pressure:
Start by removing the protective air valve cap. With the valve cap off and the faucet open, insert the gauge into the valve and release or add more air in order to get pressure levels of 2 psi lower than the pressure switch pump cut-in setting. If your pressure switch is set at 30/50 psi, the pressure at the top of the tank should be 28 psi.
You may also want to replace the protective air valve cap to make sure that the cap isn’t the component that is faulty. If you cannot locate the pressure switch setting, try navigating the pressure gauge that should be in close proximity to the pressure switch.
Once you find it, open a faucet and write down your pressure level readings after when the pump turns on. This is the cut-in pressure. This means that there is compressed air at the top of the unit and water at the bottom.
Solution to Low Tank Pressure:
If the aforementioned valve is okay but your pressure readings are still low, you will have to find a way to repressurize the RO tank. A third-party pump (a regular bike pump, for example) or an air compressor will do.
Depending on the tank’s size and dimensions, it’ll have a PSI limit that you should aim for. Once you reset the pressure levels, the system should keep running smoothly. From here, it’s a balancing act.
If you want to release pressure from the tank, open the control valve on the tank. If you need more pressure, adding a few more pumps with the pump should get you levelled.
If all else fails, you can install a booster pump in order to increase the system pressure, but let’s have that as the last resort.
2. The Tank is Leaking
If the RO tank has sprung a leak, not only will it not fill up with water as it should, but it will also provide a gateway for bacteria and contaminants to enter your water flow, making the issue more pressing.
Solution to leaky tank:
Unfortunately, the only way to fix this problem is to re-install or replace your water tank. The leak might be the result of a bad installation or external damage. In the case of the former, if re-installing your RO system with the help of a professional does not fix your problem, then you will have to get a new tank.
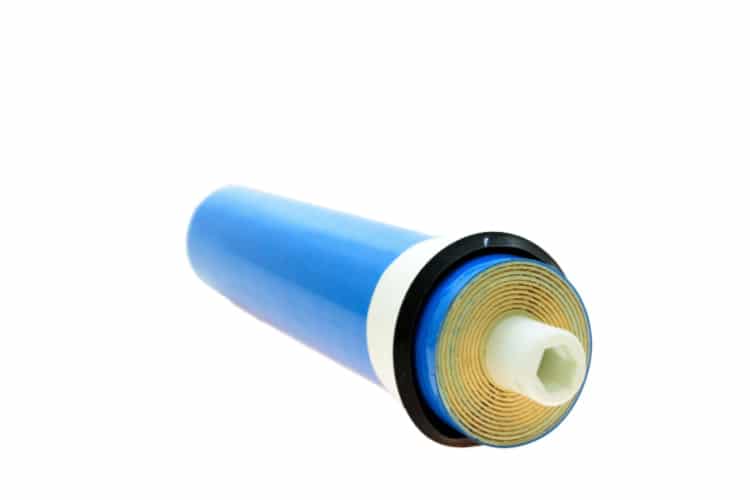
3. Clogged Filters & Membrane
Sometimes, there might be something blocking the water from entering the RO tank. This usually comes down to a clogged RO membrane or filter.
Some RO systems have softeners in them as well, which tend to form salt bridges due to the hard water coming into the system. Those may also cause a clog, preventing water from entering the tank.
Solution:
If you are dealing with a clogged filter or damaged membrane, you will have to replace them. This is part of the usual maintenance process that should take place on an annual basis. So, it’s not out of the ordinary for a filter to start clogging up when it’s time for replacement.
If you are dealing with a salt bridge or salt clog, you will have to flush the tank, stop water from entering the system by cutting off the water feed with the control valve, and poke the salt bridge with a pole to take it apart.
4. The Tank is Draining too Quickly or Not Shutting Off
Another possible reason for the RO tank is not filling up is that the tank drains too quickly or doesn’t shut off properly. If this happens to be the case, you will have to adjust the settings of the RO system to get the best water flow.
Solution:
Check and adjust the tank valve. If the valve is not responding to your actions, then its a sign that the control valve is broken and needs to be be replaced in order for the system to function properly.
The ASO or automatic shut-off valve might also be due for a replacement. If you notice that there is water flowing into your tank and it’s not leaking, but the system drains it too soon, then the ASO valve is probably the problem.
Conclusion
When troubleshooting an RO system tank, you need to take a gradual approach and eliminate the possible causes one by one until you find what’s causing the problem.
In most cases, your tank will have trouble delivering the expected water levels if it has low or imbalanced pressure levels. If this is the case, then reset the pressure levels by making use of a pump, and see if that fixes your problem.
Inspect the tank for a potential leak. Leaks caused by bad RO system installations are quite common, so the solution to your problem might come down to a proper system reinstallation.
If there are salt bridges blocking the water from entering the RO system tank, make sure to take care of them and poke them open one at a time.
Lastly, sometimes the issue is just a bugged flush cycle. If the tank is flushing too often, but you can’t seem to fix it by adjusting the valve, you’re likely dealing with a broken control valve.
I have a 5k RO system. The waste water constantly drains and doesn’t seem to stop.