Water softener resin is the part of a water softener system that attracts and traps mineral molecules during a process referred to as ion exchange. Although an automated regeneration process cleans and recharges the resin on a weekly basis, you still need to replace it as per the manufacturer instructions.
Additionally, when you expose the water-softening unit to more iron than it can handle, its efficiency will deteriorate quite quickly. So, it’s best to know about how to replace the resin when it’s necessary.
Of course, you can call a professional to handle the procedure for you, but considering that a professional plumber will charge you $150 to $200 for it, doing it yourself might be a more appealing idea.
So, in this guide, we’ll walk you through it with step-by-step instructions. We’ll also cover questions like how long a standard softener resin lasts and how much a new one costs.
Tools You Need for Water Softener Resin Replacement
Before setting out to replace the resin, you need to have the following tools:
- 4-in-1 screwdriver: You’ll need to unscrew the control valve/head on the resin tank to be able to get the resin out. A screwdriver is a must-have to be able to do this.
- Funnel: It’s best to pour the replacement resin in with the help of a funnel.
- Gravel (optional): Gravel often makes up the bottom section of a resin tank, but it’s not a must at all. Not all water softeners have gravel, so if you’re not sure whether yours has it or not, consult the instruction manual or contact the customer service of the manufacturer. If it indeed has, then you may purchase new gravel from the manufacturer just to be thorough. If it doesn’t, you don’t need it.
- New resin: To know exactly how much resin you need for your device, contact the manufacturer and consult the instruction manual. You can also simply measure your resin tank and make sure to purchase enough resin that’ll fill at least 60% of it. It’s always best to stick with resin that the manufacturer of the device sells or recommends. Otherwise, you might be running the risk of an inefficient softening operation and you can also lose your warranty.
Once you prepare these tools and materials, it should only take you an hour or so to complete the process.
How to Replace Water Softener Resin
Now that we have all we need to replace the resin, let’s get on with it:
Time needed: 50 minutes
Step-by-Step Guide to Replacing Water Softener Resin
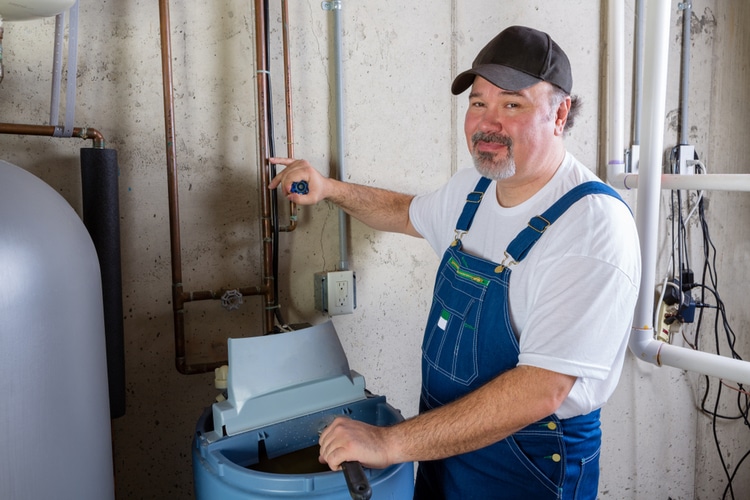
- Turn Off the Water Softener Control Valve
Turn off the control valve that controls the incoming and outgoing water flow to the water softener. This valve is typically on top of the resin tank.
Then, unplug it from power source and disconnect all the lines and hoses that come in or go out of it (usually, drain line and brine line). You must ensure that there are no leaks before continuing. - Remove the Control Valve
Use the screwdriver to unscrew the control valve from the resin tank.
- Remove the Product Tube
The product tube, sometimes also referred to as the distributor tube, often comes attached to the control valve. It’s the resin tank component that the softened water flows out of. When you’re unscrewing and separating the control valve, it should come out as well. You can then disconnect the two.
- Take Out the Old Resin
The ideal way to remove resin from the resin tank is by laying the tank down on its side and cleaning whatever’s inside by hand. However, if that’s not possible due to the size and location of the softener, a shop vacuum can usually suck all that resin in. If the device has any gravel inside, it’ll be cleaned out during this step as well.
- Clean the Resin Tank
You can clean the inside of the resin tank with a regular chlorine solution and scrub it with a soft sponge/brush with a handle that’s long enough to reach everywhere inside. Make sure you rinse it thoroughly before putting in new resin. After the sanitation process, get the tank back in its original vertical position.
- Put in Gravel
If the device uses gravel, pour it down through the funnel following manufacturer instructions. Skip this step if it doesn’t use gravel
- Put Back the Product Tube
Put the product tube back inside and make sure you cover its mouth with tape so that the resin you’re pouring in doesn’t enter the tube.
- Pour in the New Resin
Again, using a funnel, pour in the replacement resin you purchased. Then, remove the tape over the product tube.
- Reassemble the Control Valve
Reassemble the control valve by connecting it to the product tube, resin tank, and drain and brine lines. After making sure that everything is in its right place, turn the water and the system on.
- Run a Manual Regeneration Cycle
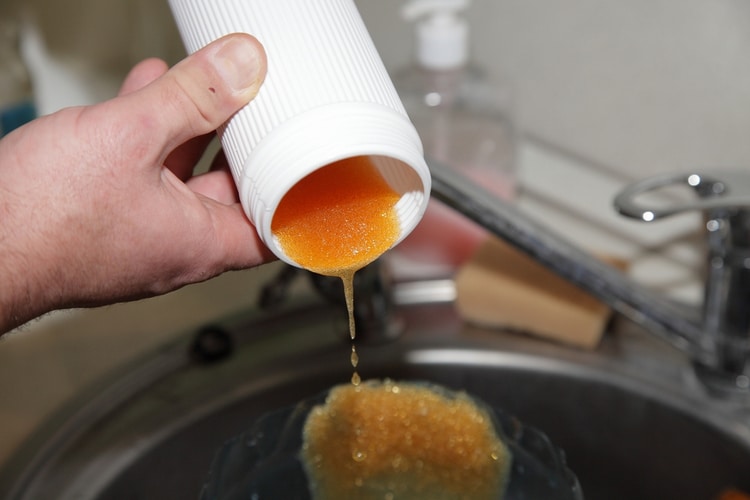
Follow the instruction manual of the device to run a manual regen cycle. After the device completes regenerating, check the water that’s coming out of your faucets for softness based on the information provided in our hard water guide. Some resin might produce yellow water after replacement. In such cases, run as many regen cycles as it takes for the water to return to normal.
How Often Should You Replace the Water Softener Resin?
Usually, a resin bed lasts 8 to 15 years, but it ultimately depends on a wide variety of variables:
- The quality of the resin: A high-quality, manufacturer-recommended resin will last longer than a cheap one.
- The crosslink percentage of the resin: Water softener resin beads are made of food-grade plastic materials like cross-linked synthetic polymer. More often than not, the crosslink percentage of softener resins is either 8% or 10%. While an 8% cross-linked resin can last 10 years, a 10% one can last 15 to 20 years under the same conditions.
- Water hardness: If a device has to deal with extremely hard water, its resin will deteriorate sooner than expected due to all the calcium and magnesium content it has to deal with.
- Iron levels of the water supply: Although water softeners can remove iron, it can only do so when the iron levels in water doesn’t surpass 2 to 5 mg/L. When above those levels, iron will start building up on the resin, eventually rendering the device inefficient. So, if the water supply has more iron than those levels, it’s best to complement the softening device with a capable iron filter.
- Chlorine levels: Municipal authorities often sanitize tap water with chlorine and chloramines to prevent bacterial infestation. But the content of these chemicals might cause softener resin to degrade before its expected lifespan. That’s why a pre-filter that can remove chlorine and chloramines before the water enters the softening system is always a good idea.
- Maintenance: Although water softening units clean themselves during the regen process, you still need to take steps to clean them every once in a while to prevent salt bridges. Depending on manufacturer recommendations, you can sanitize the resin using a water softener cleaning solution, vinegar, or bleach. You can head to our guide on how to clean a water softener device to learn all about it. How well you do it will inevitably affect the lifespan of the unit.
How Do I Know When My Resin is in Poor Condition?
If you notice calcium and magnesium mineral stains & buildup in your sinks, faucets, and appliances, despite the water softener working properly, then it could be a sign that your water softener resin is no longer removing the minerals and it needs replacement.
How Much Does It Cost to Replace Water Softener Resin?
The cost of resin replacement depends solely on what kind of new resin you want to purchase and how much of it you need, but if you don’t want to purchase a low-quality resin, expect to spend as much as $150 for a high-quality water softener resin.
Expect to spend an additional $200 if you opt for professional replacement instead of DIY.
Conclusion
Water softener resin may require replacement every 8 to 15 years depending on the water hardness level, iron content, chlorine contact, maintenance, and, ultimately, its own quality and crosslink percentage. You can either pay an extra $200 to hire a professional to replace it, or you can do it yourself by following our step-by-step guide above.
If the resin of your device has deteriorated before the lifespan the manufacturer attributed to it, you should also check the chlorine and iron levels of your water supply. If these are more than the device can handle, it might be best to complement the unit with an iron filter or pre-filter.
Also, cleaning the system regularly may help extend the lifespan of the resin.
Thank you for sharing this! This guide will help me a lot!