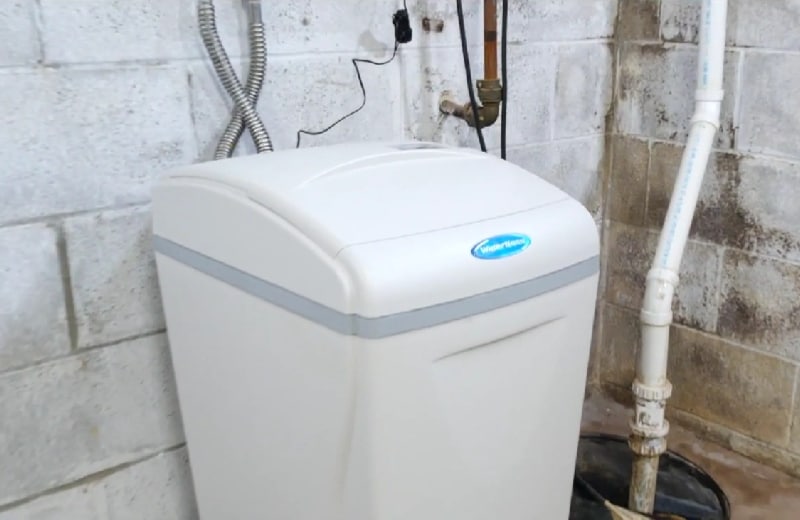
Water softeners are designed to remove mineral ions from water and replace them with sodium in a process called ion exchange. While that’s the general idea of how water softeners work, there are a few nuances people don’t understand.
One of these nuances is the acceptable water hardness level your system should try to reach.
If you’re not sure about what this is or how to set your device to achieve it, then our article might be able to help.

Understand Hard Water
For water to be hard, it has to contain large amounts of magnesium and calcium (more on this later). There are many areas in many states throughout the US that have hard water running through the pipes, but it’s also very commonly found in wells.
The reason why certain areas have hard water is mainly that the water is drawn from underground aquifers. Since an aquifer is essentially a reservoir of underground water surrounded by rocks, it’s no surprise that the minerals from the soil can also be found in the water.
In general, minerals in your drinking water aren’t detrimental to your health; in fact, they even have some health benefits. However, hard water has several negative side effects on your home.
Hard water can speed up limescale formation on glasses, dishes, and surfaces, it can cause your laundry to look worn out after just a few washes, and it also makes it more difficult to lather soap, detergent, or body washes and cleanser products.
Additionally, while drinking mineral-rich water isn’t bad for your health, hard water can still cause your skin to itch and your scalp to get irritated if you wash with it. There are also several other things that water softeners can protect you from.
Water Hardness Measurements
There are two things that you need to know when it comes to determining water hardness. The first is that it’s not a binary system of soft or hard but rather a gradient of different hardness levels.
The second thing is that there are two different measurement units that you can use. The first one is called GPG, which stands for grains per gallon, while the other is called PPM, which stands for parts per million.
Both of these units of measurement have the same scale when it comes to water hardness. Water has 5 levels of hardness, namely:
- Soft
- Slightly Hard
- Moderately Hard
- Hard
- Very Hard
Water softeners usually measure water hardness in GPG, while water testing kits do it in PPM. It’s a bit confusing at first, but all you really need to know is that GPG can easily be converted into PPM by simply multiplying it by 17.118 and rounding up or down to the closest decimal point.
Essentially, this means that the exact PPM of moderately hard water goes up to 119.7, but we rounded it up to 120 so that it’s easier to remember (and because the extra 0.3 PPM doesn’t really matter).
At the end of the day, this is what your water hardness chart should look like:
| GPG | PPM | Water Hardness |
| <1 | <17 | Soft |
| 1-3.5 | 17-60 | Slightly Hard |
| 3.5-7 | 60-120 | Moderately Hard |
| 7-14 | 120-240 | Hard |
| >14 | >240 | Very Hard |
Testing the Water
There are several homemade ways to test your water for hardness using water bottles, dish soap, and other items. You can find a lot of those methods online if you want, but in our opinion, a home water testing kit is a lot more accurate than any improvised testing method.
All you need to do is go to your local pool supply shop, get a testing kit for water hardness, and read what it says on the packaging. Most of these testing kits are just colored strips that you have to stick inside a glass of water.
Once the strip turns a certain color, you’ll match it to the color chart on your box or in your kit, and you’ll find the estimated water hardness that you’re working with.
However, if you want to make sure that the water test is as reliable as possible, then we’d suggest getting a sample and sending it to a water testing facility. It costs a bit more than a home testing kit, but it produces the most accurate readings, and it tests for a lot more contaminants and minerals than the home kit.
There’s just one thing that you might want to keep in mind. Most water testing kits calculate water hardness either in PPM or MG/L. The reason why we didn’t mention this third measurement unit before is because it’s essentially the same as PPM.
We’d recommend you treat both values as the same, but if you really want to make sure that you have the exact estimate, then all you need to do is multiply the MG/L value by 0.998859, and you’ll get the PPM value.
Different Measurements
We should probably mention that there’s no one source on what the water hardness levels should be exactly.
Sites like GE appliances put it at around the same estimate as what we have, but they only separate hardness into 3 groups rather than 5.
The Washington Water website, on the other hand, is a bit more lenient with the PPM estimations and considers water to be very hard only past the 300 PPM mark.
And Water Pursuit uses 4 water hardness groups, which are close to Washington Water’s estimates.
What we’re trying to say is that you might find different information online from what you see here because this isn’t really an exact science. What matters is that all of the estimates are in the same general ballpark, so you’ll know what constitutes very hard water and what constitutes soft water.
The Settings

As we’ve already mentioned, water hardness isn’t a binary system, so you have a few options when it comes to how you want to set your water softener.
The first thing that you should keep in mind is that you get the right water softener for your area. Certain models are much more suited to very hard water than others. Most sites display the GPG that a particular softener can handle, so it’s only a matter of picking the right one.
Once you’re sure that your softener can keep up with the water hardness in your area, you’ll need to go into your settings and find the GPG option.
If you know the PPM in your area, all you need to do is divide the number by 17.1, and you’ll get the GPG that you should set your softener to. If the number you get is a decimal, we recommend rounding up to the higher number.
For example, if the PPM is 220, and the estimated GPG is 12.8, you’ll want to set your softener to 13 so that it can handle the hardness in the water better.
Conclusion
After you’ve set the correct hardness settings and the softener is working, we’d recommend doing another test. Check to see if the water now qualifies as soft or at least only slightly hard, according to the chart.
Anything below 1 GPG would be ideal, but at a stretch, a GPG of up to 4 or so still won’t cause too much damage to your clothes or pipes. However, if the numbers get higher than that, then either the softener you have is underpowered for the area that you live in, or there’s something wrong with the system.