What is Iron Bacteria?
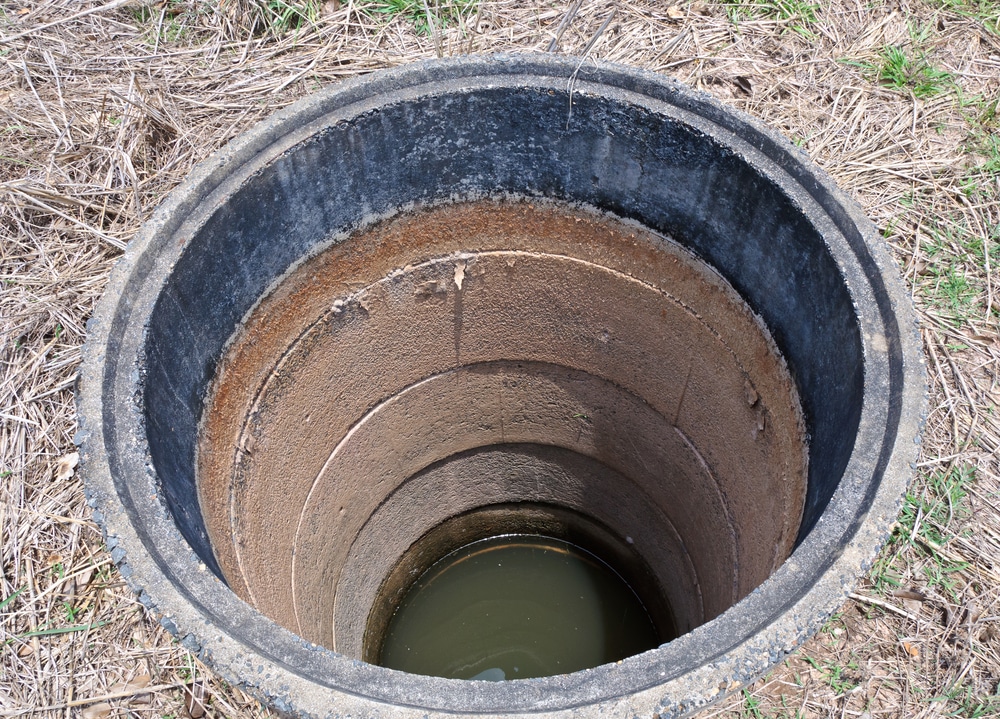
Iron bacteria refers to micro-organisms that are present in soil, groundwater rich in iron, and surface waters. Similarly to iron deposits in the soil, iron bacteria also makes its way to the underground aquifer (well water source) when carried by rain or underground seismic movement.
Although harmless in its normal state, the micro-organisms in iron bacteria eats and dissolves the iron molecules when they have access to oxygen (especially when they’re in high concentration). This leads to bacterial overgrowth. Since well water is rich in iron and other minerals, the iron bacteria have favorable conditions to proliferate in well-water reservoirs.
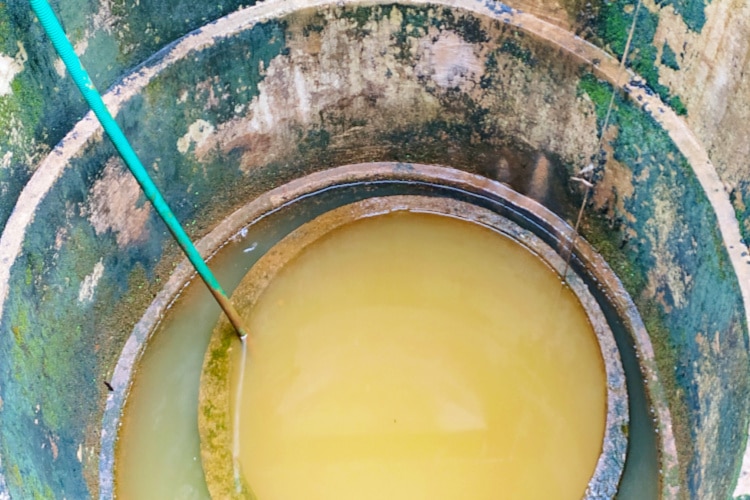
Once the bacteria have dissolved enough iron, they secrete rust-colored slime in the water.
If this happens, the rust-colored slimy organisms will move through the water or the well system and stick to surfaces. These surfaces include anything from the well reservoir to the pipes that distributes the water throughout the house. You may eventually experience slimy feel or metallic taste from your water.
Iron Bacteria in Well Water Symptoms
Here are the most common symptoms of iron bacteria in water:
- Oily/slimy/gas or petroleum feel
- Yellow, orange, red or brown stains & color in the water
- Rotten eggs, sewage smell
An early sign of iron bacteria contamination is that the water feels oily or gives off a slight tinge of gas or petroleum. This is not a good sign, and you should take action immediately. But this stage is not nearly as bad as what will happen if you ignore the symptoms.
If the bacteria is given enough time to grow, the water will eventually give off a rotten egg or sewage smell.
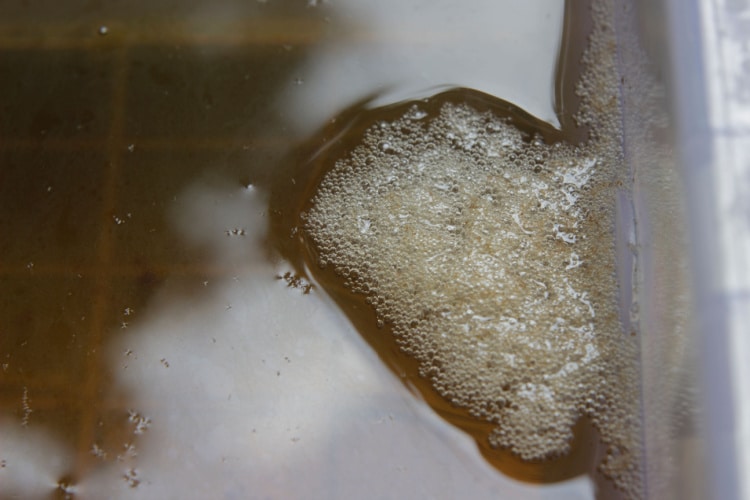
Visually, depending on the total bacterial overgrowth, the water may also have a yellow, orange, red, or brown coloration. Initially, you may just notice a rainbow sheen on the water, like on an oil spill when the light gets reflected off of it.
Additionally, you may even get bits of slime floating in your water. This is the iron bacteria itself, or more precisely, a dislodged chunk of iron bacteria from the larger body that’s likely stuck to the inside of your pipes.
How to Remove Iron Bacteria in Well Water
1. Shock Chlorination
Shock chlorination is the most common and effective way to treat for iron bacteria in water. It involves pouring a strong chlorine (bleach) solution into the well and circulating it through the water system until it kills all the bacteria in the reservoir and pipes.
Shock chlorination is a lengthy process, and it uses quite a bit of water, but you can learn how to do it yourself by reading our detailed instructions in the how to shock a well section of this article.
2. Acids
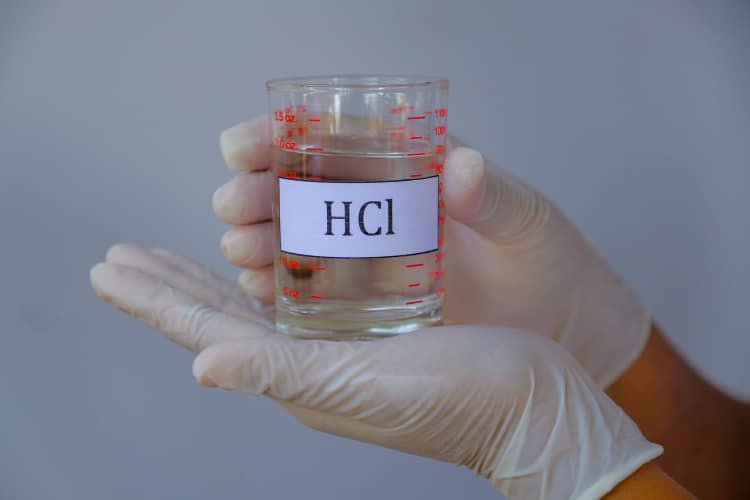
Acids are another way to remove iron bacteria in water, although the exact mixture & concentration varies from company to company, and it’s usually considered a trade secret – more or less.
Hydrochloric and sulfuric acid are the two most commonly used by professionals to remove iron from well-water reservoirs, and they can be obtained in liquid, powdered, or pellet form. The special mixture of acids is directly added to the well system or diluted with water in a bucket to make a solution that’s then added to the reservoir.
The strength of the acids and their form (liquid, palette, or powder) determines whether or not they’ll be added to the reservoir directly or if they need to be diluted first. Different well-cleaning companies and well manufacturers have different recommended acid mixtures, so the formula is never the same.
Once the acid is added to the system, it should stay in the reservoir for 24 to 48 hours, during which the water should constantly be cycled through the system. When it exceeds 2 days, the acid in the well must be removed completely.
Usually, the pump runs for several hours until the water test says that there’s no acid in the water. This process can sometimes take a full day or more, depending on the size of your reservoir and the amount of acid in the system.
Additionally, with this process, you’ll be pumping gallons and gallons of acid-infused water out of your system, so you need to ensure that the water is handled carefully and disposed of in a way that won’t cause damage to the environment. I’ll recommend contacting the local water department for guidance on how to safely dispose of the water.
That said, working with acids is extremely dangerous. If you want your well reservoir to be cleaned with acid, our recommendation is to hire professionals. Getting professionals to do the job for you might cost you a few thousand dollars, but you’ll save yourself a lot of headaches.
Cheapest Way to Remove Iron Bacteria From Well Water
Shock chlorination is the cheapest way to remove iron bacteria from well water. The process can cost as little as $20 (depending on the amount of bleach you’ll need), and it can completely remove iron bacteria in water, which makes it significantly cheaper than other treatment methods.
That being said, it’s important to note that the price of the different treatment methods for iron bacteria removal heavily depends on whether you can do them yourself or need to have them done by a professional. You do save a lot of money if you remove the bacteria on your own instead of hiring a crew of professionals, but make sure that you’re up for the task.
Before jumping the gun, you should consider that you’re not only taking on a major cleaning job, but you’re also using extremely dangerous chemicals, and you’re pouring said chemicals into the water source that is responsible for supplying the water needs of your family.
How to Shock a Well for Iron Bacteria
To learn how to shock a well to remove iron bacteria, we’ll go over each step of the process in as much detail as possible. It might come off as a lot of information at first, but you can read this section of the article several times until things sink in.
This guide is further divided into 2 parts:
Preparatory Steps:
1. Gear That You’ll Need
Here’s every item that you’ll need to have at hand before you start the chlorination process:
- A plastic or tarpaulin sheet
- A 5-gallon bucket
- A spool of string or duck tape
- A 120 Oz bottle of 200 ppm chlorine
- Heavy-duty gloves
- Protective goggles
- A funnel
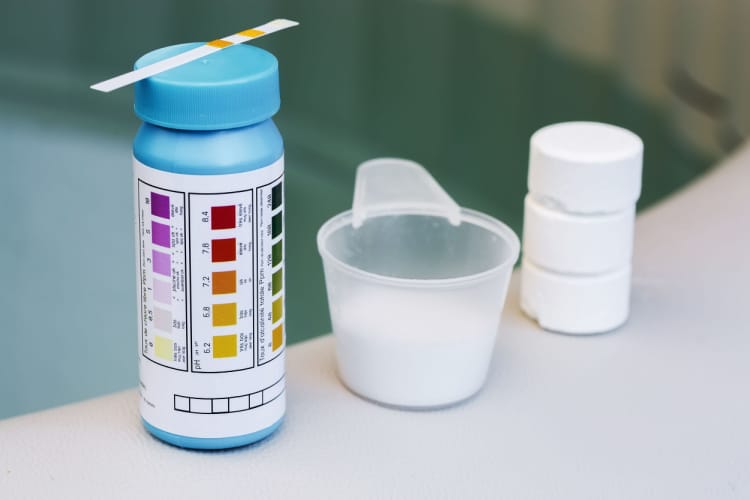
- A chlorine testing kit
2. Prepare Water
Shocking a well with chlorine takes around 48 hours, so we recommend filling up at least a dozen bottles so that you have water for drinking and household use for the next two days.
Additionally, keep in mind that you’re not going to be able to take showers, use the washing machine, wash your dishes, or even flush the toilet with your home water supply.
For two days, you can only use the water you’ve stored before starting the treatment.
3. Turn Off Your Filters
Well water systems generally have several different filters attached to them, so you need to find yours and turn them off. Bleach destroys filtration systems and water softeners, so you’ll need to ensure that all of your filtration units are turned off.
If you’re using a water softener, you should be able to see the water softener bypass valves on top of the resin tank. These bypass valves are usually located near the water intake for the system, and turning them can redirect the water to simply pass through the top of the tank rather than through the resin tank.
If you’re unsure about what you’re doing, consult your water softener manual or a professional. When you’re sure the water isn’t entering the resin tank itself, it’s time to move on to the other systems.
If you have a reverse osmosis system, you should disconnect it. Larger RO systems have bypass valves like water softeners, but smaller units like under-sink models need to be disconnected from the main water line.
As for pre-filters or sediment filters, they’re usually built into the water system itself, so they can’t be redirected or detached. However, these units work on cartridges. Open the casing, remove the filter cartridge, and put the empty casing back into place.
The water will pass through the empty casing, but the main part of the filter itself is no longer in danger, so you can feel free to start the shock chlorination process.
4. Be Careful Around Electricity
There are several types of well systems; and the ones with pitless adaptors are the most dangerous in terms of potential electrical hazards.
Pitless adapters have wires under the well cap. These wires need to be removed and put to the side for safety. To do that, we recommend getting some string. But before you head to the well cap, make sure you turn off the circuit breaker for the well – just to be safe.
Once the power is off, open the cap, carefully remove the wires you see, and attach them to the side of the well. We recommend tying or taping the wires to the side of the well so they don’t fall during the shock chlorination process.
Once that’s done, turn the power back on, and make sure you stay on the opposite side of the well, away from the wires, as an extra precaution measure.
5. Getting Things Ready
Make sure that you’re wearing protective goggles and heavy-duty gloves. If you can’t get goggles, ensure that you don’t stare directly down the well as the fumes rise, and make sure that you wear a special breathing mask. Bleach is a very dangerous chemical and should be handled very carefully.
Additionally, we’d really recommend putting down a tarpaulin or a plastic sheet around the well, especially if you have grass in the area. The bleach can damage the soil, so having a sheet to gather any accidental leaks is always a good idea.
Shocking the Well With Chlorine (Bleach)
1. Mixing the Bleach
To mix the bleach (chlorine) with water, you’ll need a 5-gallon bucket.
Make sure the bleach is labeled as 100 to 200 ppm. This is usually written on the side of the bottle. Bleach concentration less than 100 ppm won’t be strong enough to remove the bacteria inside the well water. On the other hand, concentration greater than 200 ppm might leave traces of bleach in the water system even after several water cycles. This will then require you to take extra steps to effectively remove the chlorine from water.
Fill ¾ of the 5-gallon bucket with water. Then, carefully add the bleach. The amount of bleach you’ll need to add depends on the amount of water in the well and the size of the well casing.
If you’re unsure about the size of the casing, consult your well manual or call the manufacturer. You can also ask them about the amount of water in your well.
However, if they don’t have info on the exact volume of water in your well, you can also go into your state’s registry and find info on the underground bodies of water you’re drawing from. Well aquifers are generally well-documented.
Once you know the measurements, add the specified amount of bleach to the water according to the chart below.
| Amount of water in well in feet | Well Casing Size in inches | ||
|---|---|---|---|
| 2 | 4 | 6 | |
| 10 | 2 cups | 2 cups | 2 cups |
| 50 | 2 cups | 2 cups | 3 cups |
| 100 | 2 cups | 3 cups | 4 cups |
| 300 | 3 cups | 4 cups | 10 cups |
2. Pour the Bleach in the Well
Once you’ve set everything up, you’ll need to get a funnel, open up the cap of the well, and stick the funnel inside the opening. When the funnel is firmly in place, you can start pouring the bleach down the well.
When pouring, make sure that your eyes and face are as far away from the bleach and fumes as possible – or well protected with safety goggles and a face mask.
If you don’t want to manually add bleach to the water, you can also opt for a chlorine pump injection system instead.
3. Cycle the Water in the Well
Once you’ve added the bleach mixture into the well, you’ll need to turn the pump back on. With the power on, you should remember that the wires outside the well are now live, so you’ll need to be careful around them.
The next step is to grab your hose and take it as far away from your well, your septic system, your lawn, and any bodies of water as possible.
Once you’re sure you can’t contaminate any soil or water, turn the water on and let it run for about 10 minutes. You can stop when the water stops being cloudy and comes out clear.
When the water is clear, turn it off and take the hose back to the well.
After, place the hose in the funnel and turn the water on again. As the water flows, you’ll notice a prominent bleach smell coming from the well. Mark the moment you detected the bleach smell and leave the hose running for another half an hour.
After the 30 minutes have passed, the chlorine should have sufficiently circulated through the system.
The next step is to test the water coming from the hose with the chlorine testing kit. If the test shows that the chlorine levels are below 50 ppm, then add another dose of the bleach solution and cycle the water again until you get the desired result (>50 ppm).
4. Cycle the Water Throughout the House
When you detect at least 50 ppm of chlorine, turn off the hose and go into the house. Turn on your faucets and shower heads, and flush your toilet. Let the faucet and shower head run for 5 minutes, then turn them off. This takes the chlorine solution throughout the house and in every pipe.
At this point, we recommend removing the aerators from your faucet and your shower heads. This will prevent the bacteria from building up inside when you need to purge the system later on. It’s also an excellent time to clean these components since they’re very likely caked in slime anyway.
We suggest putting them in a plastic bowl or bucket and pouring in a solution that’s ⅔ water and ⅓ white vinegar. This will dislodge any scum from the surface, so you can easily remove it by rinsing the components with water.
5. Give It Some Time
Once you’ve cycled the water throughout the house, you’ll need to put back the cap on the well and wait for at least half a day for the chlorine solution to work its magic.
We recommend giving it a full 24 hours just to be sure, but if you’re in a hurry to get your water back on, 12 hours is the minimum waiting time.
6. Flush Chlorine Out of the System
After the chlorine has disinfected the water, it’s time to get rid of it. The only way to do this is to get the hose again and either go up to a sewage drain or someplace where dumping chlorinated water is safe and start draining the water.
Turn the hose on and just let it run for a few hours. It usually takes between 3 hours and a full day to get rid of the chlorine in your well water, but this depends on how large your reservoir is.
We recommend turning the hose on and waiting for at least 4 hours. After the fourth hour mark, do a chlorine test and make sure that the reading shows 0 ppm. If the number isn’t at zero, then there’s still bleach in the system. Repeat this process every two hours until you get a reading of 0 ppm.
Test every faucet and shower head and make sure that they have a 0 ppm reading everywhere. Once you get the desired result, turn off the hose.
Screw the aerators and shower heads back in place and flush the toilet to ensure the bacteria aren’t in those pipes either.
We recommend running your washing machine and dishwasher on empty at least once to cycle out the water in the pipes.
7. Put Everything Back Together
Once the chlorine leaves your pipes, the iron bacteria should also be gone. And, since there’s no more bleach in the system, it’s time to reconnect all of your filters to the well water system.
With everything put together, you’ve officially finished the shock chlorine process.
Testing for Iron Bacteria in Water
Home testing kits can’t detect bacteria, so unless there are visual changes to the water or a distinct odor, the only way to test for iron bacteria is to send a water sample to a water testing lab near you.
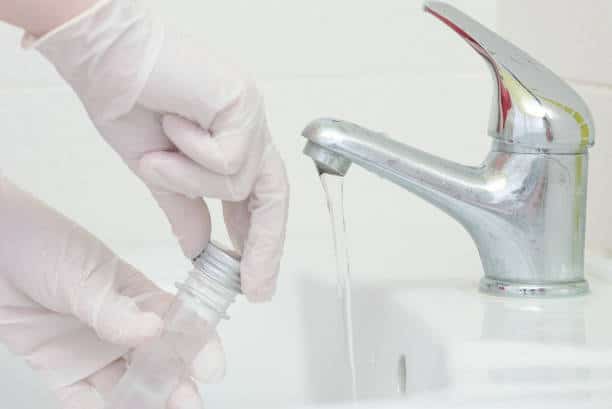
Get a cup with a lid and fill it with water from your faucet. Close the cap and take the sample down to a water testing lab. Be sure to ask for a specific form since iron bacteria isn’t on the list of standard water contaminants that labs test for.
Ask the receptionist for a form, but if they don’t have a specific one, then ask where you can specify the bacteria you’re testing for.
Once the forms are filled out, all left is to leave your contact info and your water sample and wait for the lab to call you with the results.
While this method is a bit of a pain, it’s the only reliable way to detect iron bacteria in your water.
Home tests might or might not pick up iron in your reservoir, but even if they do, that’s less than useless. Well water is always rich in those minerals, so finding them in your water is not a good indicator of iron bacteria overgrowth.
Frequently Asked Questions
Below, you’ll find some of the most frequently asked questions on the subject of iron bacteria, as well as our answers to them.
Unfortunately iron bacteria in water cannot be removed naturally. You can use water filters to mitigate the issue to some extent, but the screens will get clogged up in no time, and you’ll be forced to replace the filters every couple of days or weeks.
Keep in mind that iron bacteria can’t be removed from the reservoir unless you use chemical compounds to dissolve them. You can scrub the inside of your pipes and your entire water system two times a week, but you need to address the main source of the bacteria as a matter of priority.
If you get a sediment or a reverse osmosis system that uses a 0.5-micron filter cartridge, then it can filter out pretty much any contaminant in your water. However, the iron bacteria bonds very strongly to water, so you won’t get much water from your taps with these filters.
Here’s the thing; tiny micron filters eliminate anything that isn’t hydrogen and oxygen molecules. But, the problem is that iron bacteria bond to these molecules too strongly and clumps together. This prevents both the bacteria and water from passing through the filter.
The slime then coagulates on the filter’s membrane until you clean it or replace it. Depending on how much bacteria is in your pipes and how much water you use on a daily basis, you’ll be spending hundreds of dollars on filters every week, at the very least. This is not sustainable or feasible, and we don’t recommend it
If the filters don’t get replaced, the water flow starts to diminish until it’s reduced to a trickle that can get past the slime on the screen, and then it will stop flowing altogether. This causes pressure to build in your pipes.
The bottom line is that while reverse osmosis filters can get of most water contaminants, including iron bacteria. The properties of the iron bacteria cause major issues with the filters and can clog them up in a matter of days. Therefore, the only effective ways of removing iron bacteria from well-water reservoirs include acids and shock chlorination.
Not only are water softeners not equipped for removing iron bacteria, but the bacteria can cause quite a lot of internal issues to water softener system.
Water softeners consist of two tanks – a resin tank and a brine tank. The resin tank is where a the ion exchange happens, in which the hard mineral ions are exchanged for sodium ions. This replacement process removes the minerals from the water and effectively softens the water.
The brine tank then uses the regeneration cycle to flush the hard minerals from the system and replenish the resin beads inside the resin tank with sodium.
While iron is a mineral, iron bacteria are living micro-organisms, so when they enter the resin tank, they coat the resin in a slimy film. This film sticks to the resin beads, and it may take several regeneration cycles to clean them effectively.
Additionally, the fact that iron bacteria speeds up corrosion and rust growth is definitely a major problem considering that rust is particularly difficult to get out of resin tanks.
In conclusion, well water is generally very rich in heavy minerals, so most well systems have a water softener attached to them. However, water softeners aren’t capable of handling iron bacteria.
Conclusion
Iron bacteria is incredibly difficult to remove once it gets into your system. Shock chlorination is the best method to get rid of it.
You’ll need to turn off and cleanse your entire system with bleach, but thanks to our detailed guide, the process should be relatively easy to understand.
On the other hand, if you’re not confident in your ability to try something this difficult, then your best bet is to call in the professionals, pay a bit more money, and save yourself a lot of headaches.