A waterlogged pressure tank forces the pump to run nonstop. If not fixed early, it may lead to permanent failure of the pump and the motor, forcing you to replace the entire system.
Here are the possible causes of a waterlogged tank and tips on how to fix this issue before it escalates further.
What Causes a Pressure Tank To Be Waterlogged?
Improper water-to-air ratio, meaning too much water and less air within the tank, causes the pressure tank to get waterlogged.
Water, being naturally incompressible, causes the pressure inside the tank to fluctuate quickly, leading to the pump going on and off.
Signs of a Waterlogged Pressure Tank
Below are common signs of a waterlogged pressure tank:
- Frequent clicking sounds
- A water tank full of water
- Poor water quality
- Water pump turning on/off
- Fluctuating water pressure
- Jumping pressure gauge reading
Repeating Clicking Sound
A repeating clicking sound is usually the first sign you’ll notice when you have a waterlogged pressure tank. The sound would start every time you’re using water in the house.
This repeated clicking sound comes from the pressure switch, whose primary function is to tell the pump when to turn on/off.
The pressure switch has contacts that could either be opened or closed. Opened means no electricity flowing since the contacts don’t touch. Closed indicates that the contacts are touching, so they send electricity to the pump to complete a circuit.
The amount of air and water inside the tank regulates when these contacts should open or close. However, when the tank becomes waterlogged, the pressure isn’t controlled anymore, leading to the pressure switch turning on/off rapidly.
The repeated clicking you hear if this is the case is the sound of the pump turning on/off just as rapidly.
A Water Tank Full of Water
For a pressure tank to work as intended, it should contain more air than water (ideally, 70% air and 30% water). Inside the tank, there’s usually a rubber air bladder placed strategically to contain the water and maintain its level.
With this technology, you will hear a hollow sound when you knock on the top side of your pressure tank. But when the rubber is ruptured or punctured, it won’t sound empty when you knock on it, meaning that it’s waterlogged.
Poor Water Quality
Perhaps your pressure tank uses water treatment equipment to keep the water quality up to a standard. The filtration media of water treatment devices usually need a specific water flow rate to be lifted up to allow proper cleaning during regeneration cycles.
However, a waterlogged tank hinders the flow rate, so the water treatment device doesn’t get properly cleaned, leading to poor water quality.
Water Pump Turning On/Off
The process where the water pump turns on/off rapidly is called short cycling. When this happens, the pressure pump can no longer regulate pressure as it should.
The water pump repeatedly turning on/off is bad for the motor since it’s being overworked. This can cause the motor to quickly burn out, which means no water for home usage.
Fluctuating Water Pressure
As earlier mentioned, a waterlogged tank can’t regulate the pressure correctly. You’ll experience the water pressure fluctuating, especially when taking a shower.
Sometimes, the water initially comes out with full or intense pressure, but then the pressure suddenly drops. The trickle of water can even die out for a few seconds before returning with low pressure.
Jumping Pressure Gauge Reading
A pressure gauge has a needle that travels between your cut-in and cut-off pressures when you’re using water at home. Both the cut-in and cut-off pressures are set in advance.
In most instances, you’ll set the pressure gauge cut in at 40psi (40 pounds per square inch) and the cut off at 60psi. The needle should travel between these two readings smoothly without jumping around.
But in a waterlogged tank, you’ll notice the needle bouncing back and forth, providing inaccurate readings. That’s because the pressure isn’t being regulated appropriately.
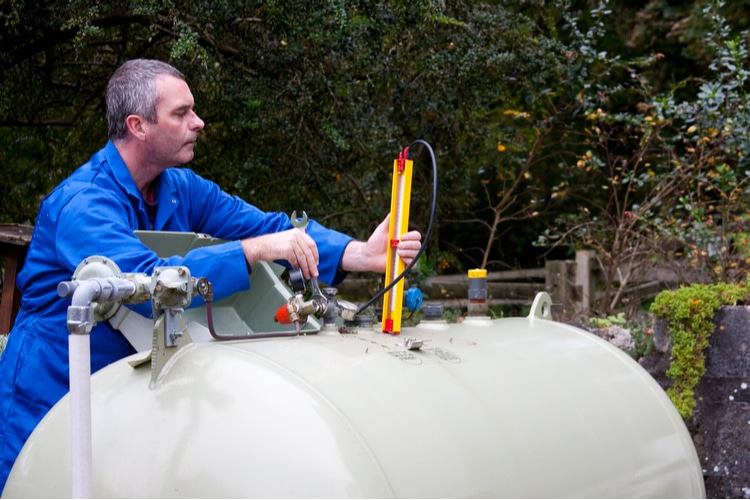
How To Fix a Waterlogged Pressure Tank
Step-by-Step guide to fixing a waterlogged pressure tank.
- Switch off the Power
Turning off the power supply to the pressure tank is a precautionary step you should take to prevent injuries or accident.
To cut the power supply, find and turn off the circuit switch. - Drain the Water Tank
An ordinary garden hose can help you drain the tank to ensure there’s no water left before proceeding to the next step. Once you get a garden hose, do the following:
– Locate the drain port near the bottom of the tank so you can connect the garden hose to it.
– Before opening the valve, ensure you direct the hose to where you want this water to go in order not to flood the whole place.
– Finally, open the valve and allow all the water in the tank to drain. - Examine the Air Settings
Close the valve once you’ve drained all the water from the tank. Then, see if your pressure tank has air-volume equipment attached to it.
Check the equator settings to ensure its readings match the standard pressure pump readings. - Power the Pump Back On
After powering the pump back on, check if it’s running. Remember to switch the circuit breaker on to avoid filling up the tank.
If It Doesn’t Return to Normal…
Even after doing all the above to fix your waterlogged pressure tank, you may still notice the pump going on/off. In that case, talk to a professional to get advice. They’ll give you an estimate if it’s fixable or tell you that you need to replace it.
Additionally, the pressure switch might be dysfunctional, or the rubber bladder inside the tank might be ruptured. In such cases, you’ll definitely need to replace those parts.
Should a Well Pressure Tank Be Full?
A well pressure tank shouldn’t be full to prevent it from getting waterlogged. This situation isn’t suitable for the tank’s motor and pumps as they may fail permanently if not fixed early.
The percentage of air inside the tank should be higher than that of water. The air gives the well water the required pressure to get out whenever you turn the faucet on. It also ensures that the water pump functions appropriately.
How to Air Charge a Pressure Tank
When the water levels rise too high inside the tank, you need to air-charge your pressure tank to return it to normal.
You can do that with the following steps:
- Turn off the pump’s power supply and the outgoing valve to the plumbing.
- Avoid any water conditioning/filtering equipment.
- Open the faucet to drain your pressure tank. Here, you need to ensure the faucet you’re opening doesn’t have water filtration equipment and let it run until there’s no more pressure left.
- As the faucet is still open, you can use an air compressor to pump the air inside your pressure tank. Continue pumping air in until the water inside the tank is nearly gone.
- The next step is to turn off the main valve connecting to the plumbing.
- Don’t stop pumping the air inside the tank until it reaches at least 25pounds of air pressure.
- Once there are at least 25pounds of air pressure inside the tank, discontinue pumping but ensure you turn back on the pump’s power supply.
- Now, open the tank’s main plumbing valve and allow the water to run until it turns clear of all sediment.
- Put back the water conditioning/filtering units into service. Congratulations, you have successfully air-charged your pressure tank.
Conclusion
Pressure tank waterlogging happens when the water-to-air ratio inside the tank is not at the recommended 30% water and 70% air ratio. This might be due to a dysfunctioning pressure switch, a ruptured bladder tank, or a short-cycling and faulty water pump.
You can diagnose whether your tank is waterlogged by checking if it frequently makes clicking sounds; if it’s full of water; if the water quality decreases; if the water pump is turning on and off rapidly; if the water pressure fluctuates; and/or if the pressure gauge readings are inconsistent.
Sometimes, switching the power off, draining the tank, checking the settings and adjusting them if necessary, and then turning it back on might fix the issue. If it doesn’t, however, you need to call a professional to ask for advice and potentially replace the faulty parts
Thanks this information is going to be very helpful with my water logged tank high in iron after I flush the tank, hopefully the settlements will not be as bad
Thanks heaps, I already suspected it was the plater gone ( valve water) but much appreciated about the little additional info here an there, as I can’t get the same size bolt any more eg 12L I’ll have to go with the 10L but I’ll have to research the pump info so I can set the right pressure in the platter so I can get max life out of the old girl. I wish there was more thing on the net set up as well as you’s have this an still abell to fulling inform one with out leaving anything or “situation” out.
A big thanks again