Regularly measuring the water level in your wells is very important. Performing this task will enable you to identify and diagnose issues with well-production before they deteriorate into more costly and severe problems such as pump damage and water outages.
What Is a Good Static Water Level In a Well?
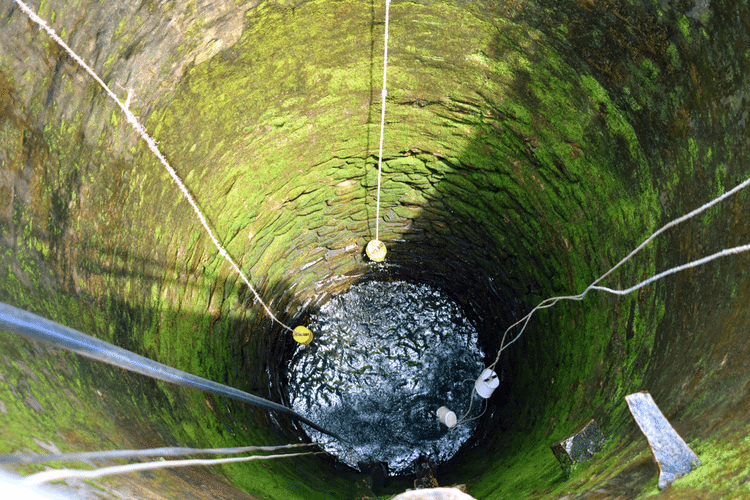
The water level in your well during normal conditions is referred to as the static water level; this metric serves as an excellent way to measure the health of the well by determining how much water remains in the aquifer.
Therefore if your well happens to dry up, it indicates that your static water level is below the pump.
For starters, determining a good static water level will depend on how deep your well is; different depths require different pump placement. Typically residential water wells static water level measures between 50ft to 800ft deep—some are over 1000ft deep.
By knowing the static water level of your well, you can prevent the overuse of the well. These levels will shift throughout the year following the changes in the season and along with the various amounts of precipitation throughout the year.
After periods of snowmelt or massive rainfall, your static water levels can be raised by the groundwater levels. Conversely, during a drought, static water levels are likely to follow suit and go down.
Furthermore, static water levels can fluctuate depending on how many homes connect to the aquifer or whether agricultural, commercial, or industrial facilities utilize the groundwater.
Having a working knowledge of your static water level is crucial when determining whether or not you need a deep well or a shallow well pump.
Generally speaking, you should never place a pump directly at the bottom of the well. On the contrary, it’s best to set the pump up 10 to 20 feet up from the bottom of the well.
Water Well Depth Measuring Devices
Below are the three methods that you can use to measure water levels in your well:
- A wetted tape
- An air line
- Depth gauge or electronic sounder
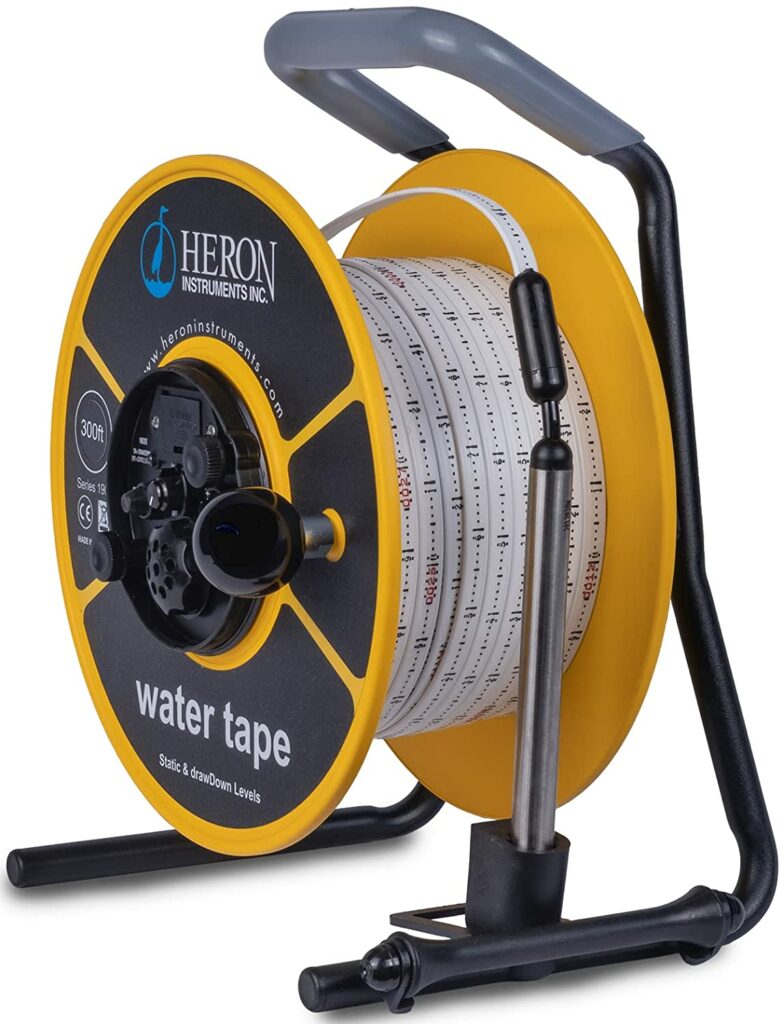
Electronic Depth Gauge
An electronic depth gauge is perhaps the best way to measure a well due to its practicality. The gauge has a weight attached to the wire, which has marks on it as well as an ammeter.
If the wire touches the water, a current will flow through the circuit. A 12 or 9-volt battery produces the current.
Wetted Tape
You can use this method reliably for measuring water levels to depths of up to approximately 90 feet. To use the wetted tape measure, you have to approximate the depth of water in your well.
Air Line
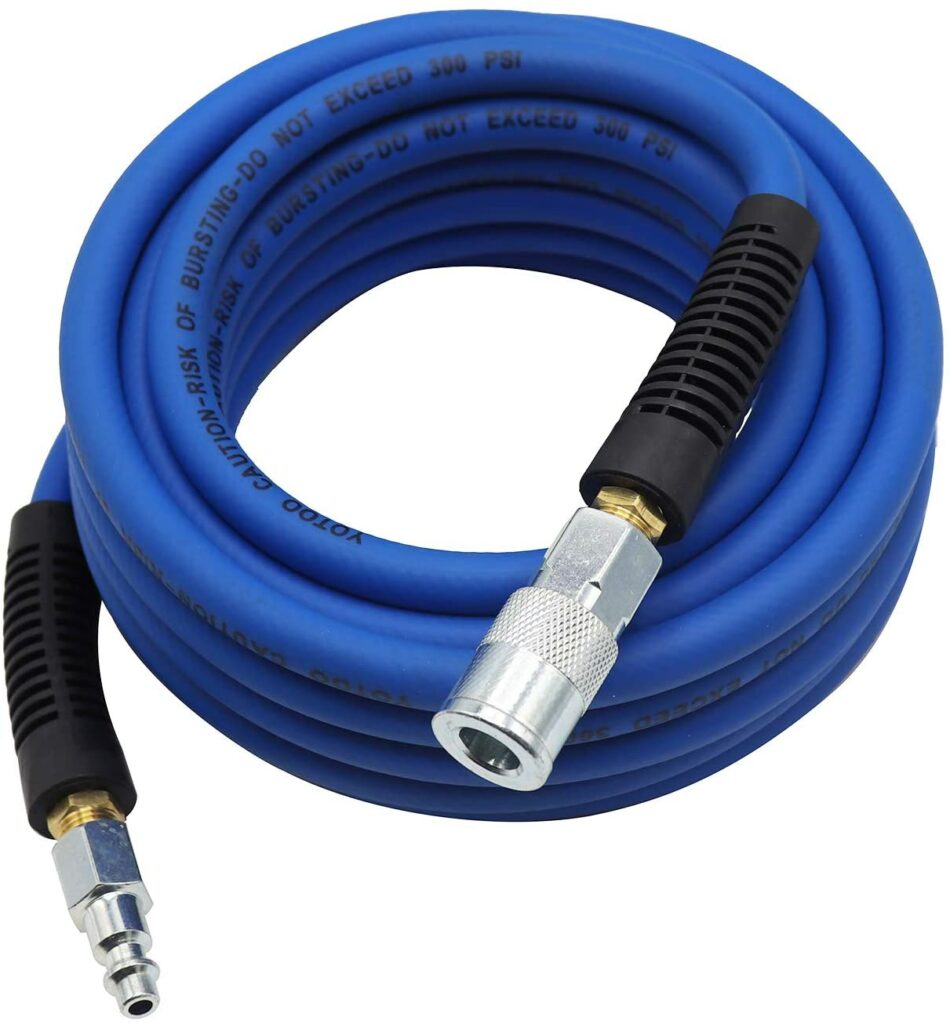
An air line is made of a small diameter of tube or pipe long enough to travel from the top of the well to 20 feet below the lowest anticipated water level. This method is best for repeated testing on deeper wells that are 300 feet deep or more.
Air lines function by first measuring the pressure of the water that’s above the opening of the air line. You can then convert the pressure measurement into the number of feet above the airline. The gauge on the air line will either display feet of water or pounds per square inch (psi).
How to Check Well Water Level
Here are the step-by-step instructions on how to check the well water level using various methods:
Using Electric Depth Gauge
- Lower the sounding line or the electric wire until the needle moves or the buzzer sounds off.
- Pull it back up and read the distance from the water to the top of the well casing.
- Mark the point on the case where you recorded the depth.
- Use a standard tape measure and check the distance between the two marks made on the line.
Using Wetted Tape
- Use a 100-foot steel measuring tape and attach a lead weight to the end.
- Before every measurement, 8-10 feet of the wetted tape gets dried and then coated with a layer of carpenter’s chalk.
- Lower the tape down into the well until the section with chalk is under the water.
- Make a foot mark at the top of the well casing after aligning it with the tape.
- Next, pull the tape up from the well, and read where the water has marked the line. You’ll determine how deep the well is by subtracting the distance from the wet mark to the mark at the top of the well casing.
Using Air Line
- Take the exact measurement of the air line before you lower it into the well.
- Ensure that the line doesn’t spiral as it goes down the well, and to keep it secure, try to attach it to the pump column.
- The end of the air line should be submerged once the pump starts fully operating. Therefore, it has to be low enough to get covered by the water.
- Attach a hand pump to the air line by fitting a pressure, valve, and a red to the top end. That allows you to calibrate the gauge, which will tell the pressure in psi of feet of water.
- Next, pump air through the line until the pressure levels displayed on the gauge begin to level off at a consistent maximum, which indicates that there isn’t any more water in the line.
- Remember that the air pressure in the line reflects the water from the water level inside the well to the bottom of the line. The length of the water column equals how much of the air line was immersed in the water.
- Convert the pressure to feet by using the formula that multiplies the pounds of pressure by 2.31. The result will be in feet. Subtract this amount from the length of the airline. That will tell you the submergence.
Note: Ensure that the air line is at least five feet higher than the pump’s suction intake, so it doesn’t get pulled through.
Using Fishing Line and Water Bottle
- Take a water bottle and fill it halfway with clean water.
- Attach a fishing line to it by tying the line to a stick and inserting it into the bottle. Tie the line with a tight knot.
- Lower the water bottle into the well and wait for the bottle to start floating on the water. You’ll know it’s floating when the bottle feels weightless.
- Make a mark on the fishing line level with the well casing and pull the bottle back to the top. Measure the mark on the fishing line to the water bottle.
Scott, hello
We just drilled a well and there is some controversy about the static water level. The well is 160 feet. The driller says that we will get eight gal/minute. The company we hired to install the pump says that there is 28 ft of static water. He says that is not enough.
Can you tell us what is a normal level for static water?
thank you.
Jim Levy
575 776 5763
Hi Jim, thanks for reading and your question. The industry typically talks about a minimum height of about 10-20′ above the well’s bottom for where to place the pump. This is for staying clear of sediment buildup and other reasons. Otherwise, there is no set static water level, per se, as it depends on many factors for wells throughout the country. If your pump company isn’t comfortable with the static water level for pump placement, I would understand their concerns as it sounds like there may be specific factors in your area/situation/well that gives them pause with the height. I am assuming they’re speaking of experience with your area and it’s needs, so it may be best to heed their concerns and see if there’s a fix to ensure smooth long-term operations for your well and water requirements.
Check whether the well can sustain any flow, without the pump losing prime. If the pump loses flow/pressure, simply pinch down the valve and time how long it takes for pressure to return. If the well recovery is quick enough to keep up with household requirements, the well pump can be timed to fill a storage tank without overtaxing the aquifer.